Did we miss anything during this quest? Is there something we didn't discover? Let us know!
This quest is opened up after finishing
The Bowerstone Resistance. You'll need to infiltrate Reaver's Manor and rescue some prisoners Page suspects of being held there. Make sure you're wearing the Masquerade Suit you received at the end of The Bowerstone Resistance, and be sure to take a liberal helping of potions along, as there will be a lot of fighting later.
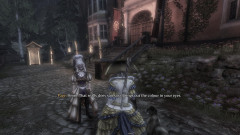
You'll meet Page outside the Manor; follow her up to the door and you'll be allowed in as any other guest. Once inside, you'll find that just about everyone is already worn out - seems you arrived late to the party. Follow the doorman, Hatch, up the stairs and Page will eventually blow your cover. Great work! Hatch, though, is on your side, and will let you forward with your weaponry in tow to rescue your friends.
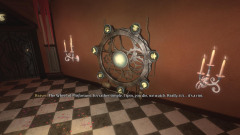 |
Follow the way forward through the door and you'll find Kidd, one of the Resistance members, locked up in a cage. Before you can get him out, Reaver will come in. Turns out he knew all along about you and has decided to arrange a little "game" to dispose of you - The Wheel of Misfortune. Charming. What you'll have to endure now are several rounds of combat, where your only goal is to survive. While the Wheel makes it appear your fights are random, they're actually the same every time. Note that before running into each chamber, there's a chest available that will contain something useful - don't miss these, as they might keep you alive. Remember, also that Page is fighting with you; she won't deal tons of damage, but she can't die and is great as a distraction for the enemies.
The chambers are, in order:
- Hobbes. Yep, more of these buggers. They're fairly easy, and will come out in waves from the doors on the side of the arena. Keep on your feet to avoid being surrounded, and when the wizard appears, kill it before they can summon in more help. Surround spells work great here, but any strategy that leads to maximum death in the shortest time possible is effective. Overall, an easy round, but it's only the first.
- Hollow Men. Haven't we seen enough of these already? The skeletons will spawn in around the arena, rather than coming in from the doors, but otherwise are pretty easily dealt with. As with all Hollow Men, they go down fairly fast and their strength is in numbers. Near the end you'll face off against a captain that summons in more Hollow Men, so make it your priority to take him down.
- Mercenaries. These guys are a bit tougher than the previous fights. They'll come out of the doors around the arena. While there aren't as many of them as the others, they're tougher overall. Your best bet is to focus on them one at a time, and take out the ranged attackers first, as they can interrupt your attacks. You'll fight some mercenary wizards near the end, and they can put out some serious pain, so take them down as fast as possible, then work on the stragglers.
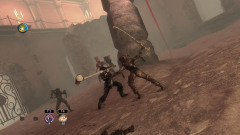
- Sand Furies. You won't have seen these enemies before, but you will get to know them later in the game. Sand Furies are basically fast ninja-types who bolt around, and are capable of both swift charges and shooting from afar with crossbows. You'll fight a large number of them, but fortunately they go down pretty quickly and you won't have to worry about any boss versions of them. Dodging here is your best friend, and your Summon Creatures Potions will come in very handy.
At this point, you'll return to the main room and the party guests will turn into Balverines, your second new enemy today! These guys are, much like the Sand Furies, extremely fast, with a charge attack, and they can leap up into the air to get behind you, so dodge every time you see one jump up. Although they take significantly more hits to go down than the Sand Furies, they're not quite as fast and are easier to dodge, so use that to your advantage. If you find yourself under attack, blocking can interrupt and even stun them for a counter-attack. Once again, Summon Creatures Potions work miracles here for keeping the beasts distracted. You'll have to fight some tougher Red Balverines as the fight goes on, but aside from taking more hits to kill they aren't too much more difficult.
 |
When the fighting's done, Page will take a shot at Reaver, who deflects the bullet with his sword (which isn't too surprising if you've played Fable II). He'll escape the Manor (and incidentally, never return to it), and you and Page will leave with Kidd in tow. Once you're outside, Page will ask you to swear to eliminate child labour in Bowerstone Industrial, and you'll have the support of the Bowerstone Resistance movement in full! Awesome! You're almost on your way to having an army of your own. In addition, 50 Guild Seals will be yours for surviving Reaver's deadly game. You'll also have ownership of the Manor, but you can't rent it out or sell it like other homes, unfortunately.
 |
Predictably, time will freeze up and a portal to the Road to Rule will open up ahead of you. Theresa will congratulate you on your success there, and you'll have a new level of skills to open up - in particular, the Scary Expressions Pack and level 4 versions of your combat abilities. That's right, all sorts of nice stuff this time.
You'll be returned to Millfields upon exiting, but before you go, a crier will announce that King Logan plans to give a speech. It's
off to Bowerstone Castle! Note, however, that you'll have a whole lot of new side-quests opened up at this point, so there's no rush to go see him just yet if you don't want to.