Did we miss anything during this quest? Is there something we didn't discover? Let us know!
After
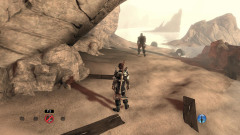
leaving Bowerstone via the boat, you'll see a cutscene of your ship being chased by Logan's navy. Seems that although Page managed to delay Logan's chase, it wasn't quite enough, and your ship will be riddled with holes. Several hours later, you'll awake on a desert island conveniently labeled Unknown Shore, Walter at your side.
This first part of the quest is quite straightforward. Turn around immediately upon gaining control and head behind you for a chest, then run back and follow Walter forward. Note that at this point, your Sanctuary will only be partially functional - Jasper is nowhere to be found, and the Treasury and Co-op rooms will be inaccessible. Don't worry, you'll get their use back at the end of the quest.
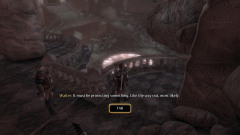
You'll meet up with your dog a minute later. Head into the cave and you'll be swarmed by bats, but these ones fortunately aren't hostile. Continue forward and Walter will speculate as to Finn's location. You'll come across some ruins deeper into the cave, along with a strange force-field in the floor below. Head around to the stairs (take the left path into the cave for a treasure chest), and walk your way down. Walter will start rummaging through the skeletons at the bottom, and ask you to do the same for another group. Head on over and grab the note.
You'll find it mentions something about "darkness incarnate", which of course is about the most promising thing one can read when surrounded by a pile of corpses. Walter will find a journal on one of the other corpses - reading the incantations within seems to dispel the barrier in the floor, revealing a staircase spiraling into the depths. Promising indeed! Climb down the stairs and you'll find yourself in a new area, significantly darker than the last, but your dog will help out by fetching a torch for Walter. Continue forward into the inky black.
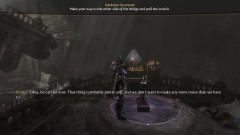 |
You'll enter into a large chamber with a chasm in the middle, but you'll quickly notice a lever on the other side. Follow Walter around to the right and jump down to the bottom ledge, then run up the stairs and around to pull the lever (if you can get to the other side that easily, then why did you even pull the... oh, never mind). After Walter's most stealthy entry is concluded, make your way up to the second force-field and Walter will invoke the spirits of the damned or some such to get through it... only it for it to close up as soon as you pass through, complete with rare witticism from your Hero.
Venture onward once more, and you'll soon hear a foreboding voice taunting you, and under attack by a new type of enemy, Shadows. Shadows are very weak and should be easily killed with a single blow, but they will swarm you relentlessly. Power your way through them and eventually they'll abate. Walter, clearly beginning to lose it, will press forward, so follow him along. Eventually he'll remark about there being a breeze ahead, so he'll run up� only for his torch to go out. Upon re-lighting it, he'll be face-to-face with some sort of creature, but it's gone just as quickly.
 |
Continue forward and you'll see the same creature up ahead, but it will quickly disappear and you'll be attacked by an onslaught of Shadows. After a time, a cutscene will begin and Walter will throw his torch at the creature, killing it. With no light, you'll have to move forward. Head up the stairs, past the force field, and make your way down the long hallway full of statues. You'll find yourself at a cavern shortly after, with a ledge to vault down.
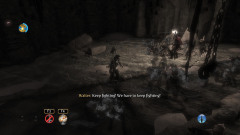
As you do, Walter will be overtaken and you'll be left alone to defend yourself against more Shadows. Defeat them, and head forward up the hill. Turn around, and you'll be attacked on the upper level by more Shadows, first on the stone platform and again up ahead near the two columns of darkness. Defeat these foes while the creature taunts you, and make your way into the ruins ahead.
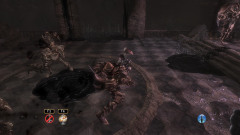
Vault down and you'll see Walter, suspended in liquid darkness, bleeding from his eyes. Not a welcome sight. You'll soon be attacked by waves of Shadows. Deal with them like the others, and you'll find yourself facing a new enemy, statue-like versions of the "children" called Dark Minions. You'll have to defeat about a dozen of them, but although they look intimidating, they're not as tough as you'd think. Smash them a few times with your heaviest weapon and they'll end up in little bits on the floor.
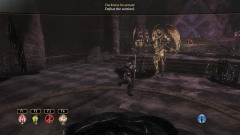
The next enemy is a bit more serious. The creature will summon in the Sentinel, an angelic living statue with a large staff. It has a powerful shockwave attack that will send dark energy towards you in a straight line, and additionally, it can summon Shadows via portals it opens up. Its weakness is that it's quite slow compared to the other enemies of its ilk, so use your advantage to circle and dodge around it, while doing your best to keep the Shadows it brings in off your back. Although it's a tough enemy, it's not the toughest you've faced before, and it will soon lie dead like the others.
At this point, the creature will release Walter, but he'll be left without his vision. Take him by the hand and lead him out of the chamber through the exit to the side, making your way towards the light in the distance. Exit the dungeon to complete the quest, and
prepare to traverse the desert...