Did we miss anything during this quest? Is there something we didn't discover? Let us know!
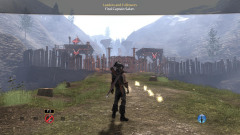
Time to deal with the Mercenary leader, Saker! Approach the gates in
full Mercenary gear (clothing, tattoos and beard), and you'll be allowed through by the guard. Make your way into the Mercenary Camp area. The Camp is pretty small and straightforward, and you won't have to do any fighting just yet, so feel free to take your time. Check underneath the watchtower near the entrance for a chest, and across from it for a dig spot, then continue forward (note that most of the chests and dig spots in the Camp have the remaining Mercenary Tattoo Set pieces, in case you want them). Some of the Mercs will talk to you on the way; ignore them if you wish, or take them out if you want a fight, which will make the rest of the Mercenary Camp hostile (though you're really just delaying the inevitable by being civil).
 |
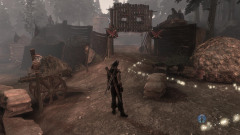
Upon approaching the next pair of gates, the guards will see through your disguise (or will already be hostile if you attacked earlier), so it's time to start fighting. These Mercenaries aren't too tough, but they're more of a challenge than the Hollow Men you faced earlier. Thankfully, there are a good number of explosive (red) barrels around the camp interior all the way up to Saker, so take advantage of them by hitting them with spells or firearms to instantly kill any Mercs standing nearby. Before heading through the gate, circle around behind the house to the small cemetery, where you'll find a few dig spots and a chest for your trouble.
Up the path are yet more Mercenaries, so continue fighting them as usual, using the explosive barrels to your advantage if you prefer. Climb up the watchtower before the path turns left for another chest, then head down the path for yet more fighting. Halfway along you'll find a dig spot, and another at the end of the way, behind the sandbags. Turn right and loop around up the hill for a little bit more fighting, heading past the gate on the left (it's locked), and past the animal cages, where you'll fight some dogs as well as Mercs. Check next to the cages for a dig spot, and near the watchtower on the hill for a
Silver Key.
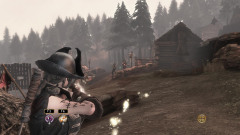
Time for the final push to Saker! There's one long stretch with some buildings, sandbags and explosive barrels set up. You can take out most of the Mercs quickly by blowing up the barrels from a distance. On your way, don't miss the chest nestled in the bushes near the first cabin, and at the end of the path, a chest containing 3 Slow Time Potions, useful in a minute, and a last dig spot. When all the nearby Mercenaries are dead, the gate will open. Enter through it - it's time to put an end to Saker.
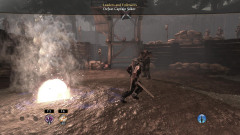 |
The Mercenary leader will seal the gate shut behind you as you enter, then jump into the arena and attack. Saker is a tough foe and your first real boss. He has a few attacks, including some fire bombs that he'll throw at you, and a ground stomp he'll perform when you get too close. The key to staying alive is to keep mobile and either attack from a distance, or use hit and run tactics, since he'll block your strikes and counter-attack if you stay close. Three times during the fight, some Mercs will jump into the ring and join the battle, and it's best to dispose of them one-by-one before continuing with Saker. He can be a fairly tough opponent, all things considered, so don't be stingy with the potions.
Eventually you'll defeat him, and he'll fall to his knees, offering you the option of either sparing his life or killing him. This is one of the first real world-affecting choices you're given. If you choose to spare Saker, he will become an ally for you along the Road to Rule, and the Mercenary Camp will turn into a town, with property to buy and people to interact with. If you're going for evil points, note that killing Saker will remove him as a potential ally against King Logan, and the Mercenary Camp will be abandoned, preventing the property from being bought.
 |
Whatever you choose, the Mercenaries will pledge to stop preying on the Dwellers and your task will be complete. Once again, time will freeze and a portal to the Road to Rule will open, where Theresa will congratulate you on your victory. More importantly, you can open the gate and gain access to the next set of upgrades, including level 2 combat abilities, some new expressions packs (including those which let you marry and raise a family), and level 2 jobs, which will earn you more money if you need it. Great!
Step through the portal again and you'll be transported back to the Mercenary Camp, and will claim Saker's Flag as your reward. Whatever you chose to do with Saker, Jasper will contact you and let you know that Walter wants to see you at the Brightwall tavern for the
second stage in helping the Dwellers.