 Did we miss anything in this section? Is there something we didn't discover?
Let us know!
Walkthrough
Did we miss anything in this section? Is there something we didn't discover?
Let us know!
Walkthrough
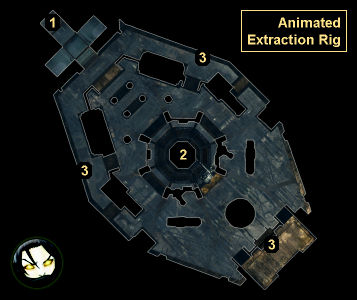
For this quest you'll need to defeat Harker's Animated Extraction Rig (#2). It will start out shielded, which means you'll barely be able to damage it. To remove the shield, you'll need to pull three emergency levers (#3). While all three levers are red, you'll be able to do normal damage to the rig. However, after turning red, the levers will shortly switch to yellow, where you won�t be able to do anything with them, and then green, where you'll be able to switch them back to red again. So you'll only be able to deal normal damage to the rig for maybe half of the time.
While you're running around pulling levers, Harker will keep sending riftshells onto the rig, and they'll keep releasing enemies until you destroy them. Worse, the closer you get to defeating the rig, the tougher the enemies will get, to the point where you'll eventually start seeing a lot of boss creatures. So you'll have to manage your attacks, dealing as much damage as you can to the rig while not allowing yourself to get overwhelmed by the extra enemies. This is one of the few places in the game where you might want to keep your chimera available for summoning.
The rig has a ton of hit points (the exact amount depends on the campaign and the difficulty) so it'll take you a while to wear it down. If you're not having any trouble with the adds, then you might want to hang out for a while and grind some extra xp and equipment. When you do finish off the rig, Prisoner Seven will show up and want to teleport you back to the
Secret Lair. You should decline this offer so you can pick up everything that dropped during the fight (including the loot from the rig). After that you can agree to go. Leaving the area will complete the quest (and Chapter 2).
Reward
1 - Starting Point
2 - Animated Extraction Rig
3 - Emergency Lever


