Did we miss anything in this location? Is there something we didn't discover? Let us know!
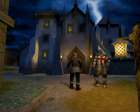
Leaving the University in pursuit of the stolen Nod fragment marks your first night as a vampire.
Wilhelm will explain to you what it means to be a vampire and that you can no longer travel
during daylight hours. Below the University is your "haven", a place where you can rest and
allocate experience points, as well as stash any equipment you don't want to carry with you. If
you haven't applied the latest
patch, then
this is also where you need to save the game. With the patch applied, you are
able to save the game anywhere.
I recommend entering the haven right away and use any experience points on your newly acquired disciplines,
especially Blood Healing. This will allow you to heal yourself more efficiently, which comes in quite
handy throughout the game.
On your way to the Monastery, be sure to pick up any rats you see scurrying about. They are a
small source of blood, but they are a blood source nonetheless. Don't actually use any of them
just yet, because once you hit Judith Bridge, you will get to feed upon the blood of an old man. Before
continuing onto Judith Bridge, however, you may want to stop at the blacksmith to sell all of your
healing elixirs, as they are ineffective on vampires and you will never be human again throughout
the course of the game. Once you've had your fill of blood from the old man, continue following
the bridge and make a left down the path towards Petrin Hill Monastery.
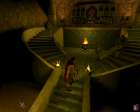 |
One tidbit of information about the Monastery worthy of note is that you can feed upon any of the
monks, even the ones around the perimeter, without alerting any guards. Therefore, if you're ever low
on blood while in Prague, take a quick trip to Petrin Hill to drink up. You can enter the Monastery
via the side door and make your way around the first couple of rooms to grab any treasure you find. It's
not until you head down the long hallway that you actually encounter resistance, which is in the form
of a couple
Cappadocians. Take them out,
grab any nearby loot (which includes some Leather Armor), and then head to the second floor.
Throughout the Monastery, you will encounter plenty of Cappadocians,
Skeletons,
Zombus, and
Corpse Minions. There are also plenty of
chests and barrels to search, which should hook you up with some more armor and/or a better weapon.
One weapon you don't want to miss is an artifact called the Femur of an Elder Tzimisce,
a fairly powerful weapon against vampires. Stash as much as you can hold between Christof
and Wilhelm in order to sell it later. On the final level, you will find two locked doors - one to
Garinol's chambers and one to
Mercurio's chambers. Don't worry about
gaining access to them just yet. Continue on through a couple of gates, taking out several Cappadocians
along the way. Within one of the further rooms, you can find a bone key that unlocks Garinol's chambers.
Head inside, kill any resistance, and then search Garinol's room. After grabbing the important items
(and reading Garinol's ledger), you will be able to enter Mercurio's room.
Before actually opening Mercurio's door, be sure to heal up and prepare for battle, as he makes for a
pretty tough fight. The key is to get within melee range and hack away, as Mercurio is lightly armored.
Keep in mind, however, that he will use the discipline Plague Wind on you, so your best bet is to align
Christof and Wilhelm on opposite sides of him so that they both don't get hit by the same cloud. Once
you've killed Mercurio, pick up the Nod fragment and head back to Ecaterina. She will tell you that a
Golem is loose in the city (thanks to
Mercurio) and you must stop it.