|
|
 Did we miss anything in this location? Is there something we didn't discover?
Let us know!
Enemies
Notable Loot
Annotations
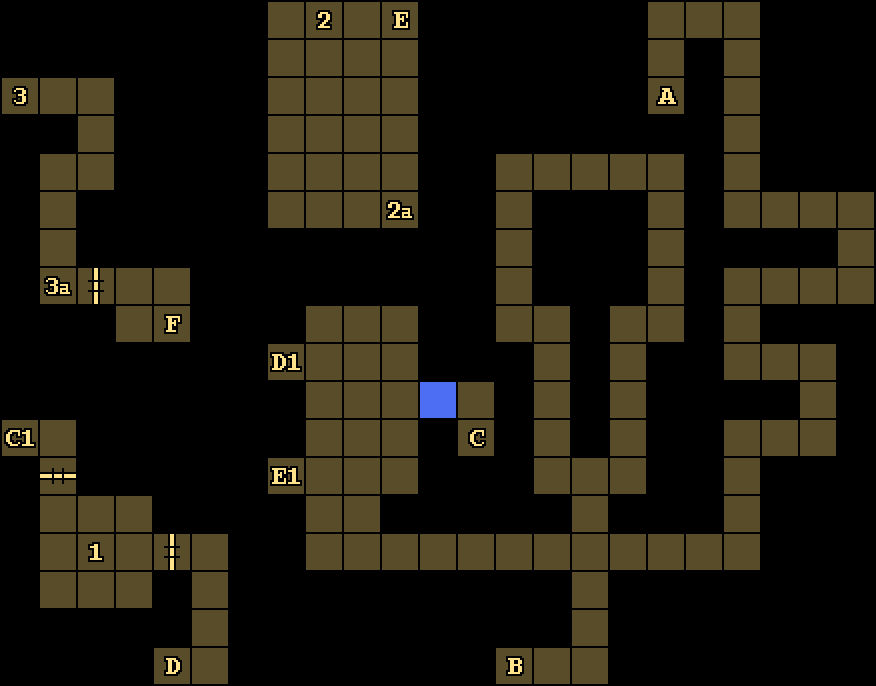
1 - Loot
Did we miss anything in this location? Is there something we didn't discover?
Let us know!
Enemies
Notable Loot
Annotations
1 - Loot
You'll find a Mage Scroll of Hold Monster and a Medusa Shield on the ground here. The Medusa Shield gives +2 to AC and +2 to saving throws against paralysis, making is useful against -- you guessed it -- medusae. You'll need six Medusa Shields on
Level 4.
2 - Pressure Plate / Button
You'll land in this part of the level if you fall into a pit during the Row of Pits puzzle on
Level 2. To escape, you'll need to weigh down the pressure plate here (#2). This will cause a button to appear to the south (#2a). When you press the button, a teleporter will appear briefly to the north (Exit E). Going through the teleporter will return you to the main part of the level.
3 - Landing Spot / Shelf / Button
You'll land here (#3) if you fall into the pit near the Western Fireball Traps on
Level 2. To escape, you'll need to place an item into the shelf to the south (#3a) and then press the button on the wall next to it. The item will disappear, but the door to the east will open, giving you access to the escape teleporter (Exit F).
Exits
- Stairs down to
Darkmoon Temple (Level 2).
- Stairs up to the
Azure Tower (Level 2).
- One-way teleporter to C1.
- One-way teleporter to D1.
- One-way teleporter to E1. This teleporter will only appear briefly when you press a button to the south (#2a).
- One-way teleporter to E1.
|
|
|