Register Lost Password?  Cookie?
  The time now is 06:50 PM GMT -6.  
Banshee Network
 
Icewind Dale
Game Information
Recent News
IWD Walkthrough
HoW Walkthrough
TotL Walkthrough
Strategy Guides
Character Information
Races
Classes
Ability Scores
Alignments
Spells
Equipment
Armor
Weapons
Miscellaneous
Media
IWD Screenshots
HoW Screenshots
TotL Screenshots
Cinematic Images
Loading Screens
Wallpaper
Other Artwork
Game Resources
Downloads
ID Revisited Interview #1
ID Revisited Interview #2
ID Revisited Interview #3
Question of the Day
Icewind Dale Review
Icewind Dale Forum
Icewind Products
Buy Icewind Dale!
Buy Heart of Winter!
Buy ID/HoW Bundle!
Site Features
Submit News
News Archives
Join Our Staff
Forums
Community Blogs
Reviews
Previews
Interviews
Editorials
About GB
Advertise With Us!
Advertisement
 

Upper Dorn's Deep 2 (AR6002)


Did we miss anything on this map? Is there something we didn't discover? Let us know!
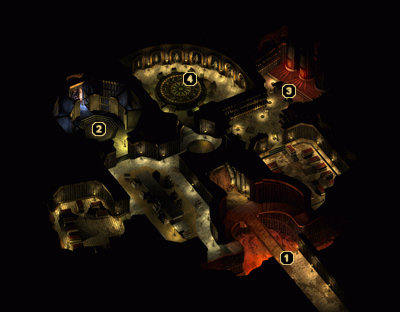


1 - Arrival

A massive ambush awaits your party just a few paces from the level's entrance. You'll be facing Drow Sorcerers, Drow Spellswords, Phase Spiders, and numerous Orc Elites and Neo Orog Marauders. Try to draw a couple of them at a time or your party will most likely suffer a casualty or two.

When the dust settles, check the Drow Sorcerer and Spellsword corpses to uncover two Daggers +1 and two Long Swords +1.


2 - Drow Battle

This room contains two Drow Vanguards, two Drow Spellswords, and a Drow Sorcerer, so prepare accordingly. Aside from the standard magical equipment that each Drow carries, you'll discover a small stash of items at the back of the room - Mithral Field Plate Armor +2, the Axe of Caged Souls, a Heavy Crossbow of Accuracy, ten Bolts of Lightning, and ten Bolts of Biting.


3 - Drow Battle

Two Drow Vanguards and three Drow Spellswords will confront your party here. All five Drow are carrying Long Swords +1 and the Vanguards wear Chainmail +1, so be sure to plunder all of the corpses once the battle is over.

You'll also notice a cave at the far end of the room. This leads to Krilag's Caves, which you should explore before passing through the secret door at area #4.


4 - Dwarven Meeting Hall

This is the room Bandoth mentioned if you brought him the Container of Razorvine Extract back in Upper Dorn's Deep 1. It is an old meeting hall for the dwarves with a large circular table at its center and several statues embedded in its walls. A secret door can be found behind the center statue, which will bring you party to the Dwarven Puzzle Room.

ID Walkthrough
Easthaven & Kuld
Easthaven
Easthaven Cave
Kuldahar Pass
Kuldahar
Vale of Shadows
Vale of Shadows
Black Wolf Temple 1
Black Wolf Temple 2
Black Wolf Temple 3
Temple of the Frgtn God
Forgotten God 1
Forgotten God 2
Forgotten God 3
Dragon's Eye
Dragon's Eye 1
Dragon's Eye 2
Dragon's Eye 3
Dragon's Eye 4
Dragon's Eye 5
Severed Hand
Severed Hand Exterior
Severed Hand 1
Severed Hand 2
Severed Hand 3
Severed Hand 4
Solonar Tower
Labelas Tower
Corellon Tower
Sheverash Tower
Upper Dorn's Deep
Upper Dorn's Deep 1
Upper Dorn's Deep 2
Krilag's Caves
Dwarven Puzzle Room
The Great Forge
Tiers of the Dead
Hall of Heroes
Wyrm's Tooth
Wyrm's Tooth
Aquatic Museum
Slave Den
Lower Museum Entrance
Transition Area
Frost Giant Caverns
Lower Dorn's Deep
Lower Dorn's Deep
The Garden
Old Dorn's Palace 1
Old Dorn's Palace 2
Gnome Pit
Gnome Village
Artisan's District
Malavon's Dome
Salamander Mines
The Greater Forge
Black Temple
Poquelin's Cave
Return to Easthaven
Return to Easthaven
Crystal Tower
 
 
      Copyright ©2000-2008, GameBanshee.com