Did we miss anything during this quest? Is there something we didn't discover? Let us know!
Speak with Commander Milton and Hobson in the records room of Ravenscar Keep, and you'll pin down your next target, "Witchcraft Mary" Godwin. Apparently, she was imprisoned for her extremely cruel experiments and under accusation that she was a witch. Well, seems like a good reason. When you're done speaking with Hobson and Milton, make your way back to the docks and board the ship to visit the Godwin Estate.
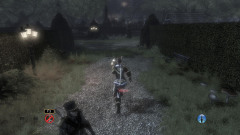
Upon arrival, you'll see the mansion itself in the distance, but first you'll have to get there. Head up the path and you'll find yourself passing by some Balverine statues... creepy. Enter through the next gate and you'll find more statues - only they're not this time. Seems Mary was keeping some pretty nasty creatures. Pummel them as you would any other Balverines, as you should be familiar with fighting them by now, then proceed onward into the garden.
In this area, you'll find a variety of exotic creatures on exhibit, including invisible chickens (which, indeed, can be kicked if you climb into their pen). Make your way through the not-quite hedge maze, grabbing the
first entry in Mary's Diary on the bench near the Topiary Swan, and you'll come across yet another electrified gate. Seems to be a common theme in this DLC. Double back and take the side path out of the garden, nabbing the
second entry of Mary's Diary on the hedge just before exiting the area, and you'll find yourself in - what else - a cemetary. Seems Witchcraft Mary may have been dabbling in necromacy.
Run onward through the cemetary, grabbing the chest on your left as you enter for part of the Sand Fury Outfit, then climb up the hill, checking a grave near the top for some minor loot. Open the gate and you'll be attacked by a "new" kind of foe - ethereal Hollow Men! These ones are just like regular Hollow Men, but being "much more ancient" means you'll need to drag them into the light shining from the dais on the ground to be able to turn them solid and actually hit them. Other than that, they should go down without much effort. When they're all disposed of, follow the path forward.
Search around this next area of the cemetary for a couple of random dig spots containing helpful potions, and search the open crypt on the right-hand side for a chest containing some more Sand Fury clothes. Ahead, you'll find another electrified fence, so move across the bridge instead. Search behind the large crates on the right and you'll find the
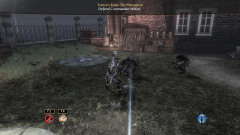
third entry in Mary's Diary, then head towards the generator. You'll come under attack by a mix of ethereal Hollow Men and Balverines, which is a significantly trickier prospect than earier. There's two of those daises to help you out against the Hollow Men, but even so this can be a difficult fight, so don't be afraid to use a liberal dose of potions.
Once the fighting's done and the generator is offline, head across the bridge and through the previously electrified fence, grabbing a dig spot on the way, and a chest - wade through the puddle on the left to get it. Back in the garden, search behind the nearby fountain for another fashionable piece of Sand Fury attire, then proceed up towards the mansion. The path ahead is blocked, unfortunately (with a dig spot right in front of the rubble), but take the way to the right and you'll soon come across a cave. In you go!
 |
The cave will soon lead into the estate's basement. Upon entering, search behind the giant ale kegs for some more Sand Fury clothes, then proceed forwards down the corridor. You'll head through yet another room and another corridor, before finally stumbling upon some sleeping Hobbes who look like they've been partying. Try to sneak through, though, and a fish mounted above the door will begin singing rather obnoxiously. All the Hobbes will wake up, some of them revealed to be spliced with other types of creatures. Deal with them, both for your own survival's sake and to stop the singing, and you'll enter into a new room. Milton will remark on some of Mary's notes that are left there (pick them up for the
fourth entry of Mary's Diary), in which she mentions General Turner.
Before you can leave, you'll be attacked by another wave of Hollow Men, featuring a new boss type: a Hollow Man who's capable of summoning minions, but who can also use an area-of-effect fire spell. Lovely. He has quite a bit of health (er, unhealth?), but just keep pounding on him, preferably from a distance, and he should eventually go down. Proceed through the new door that's opened and you'll see several portraits detailing some rather unusual members of the Godwin family. Seems that they have a history of splicing, and Mary's just following up on their work.
 |
In the next room, some Hobbes will smash a machine, causing them to turn red. What's it mean? Not much, until you kill them - they split into two blue Hobbes, and again into four green Hobbes when those die. Ultimately they aren't much more threatening than regular Hobbes, and a surround spell will teach them an eternal lesson. When they're all dead, move onward and smash through the boards in front of you for a dig spot, and continue into the side room for yet more Sand Fury attire. Head back and you'll finally enter Mary's laboratory.
Upon entering, there's the
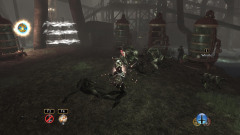
final diary entry of Mary's, as well as a treasure chest holding some useful potions. Proceed down the stairs to some ominous-looking vats. What could go wrong? Well... Poison Balverines, that's what. Ouch. These guys are pretty tough, though not quite as tough as their name might imply. They will cause a mild damage-over-time effect, but their biggest threat seems to be their increased aggression over regular Balverines. You'll have to fight about ten or so, though they break out of their vats in sequence, so you shouldn't have to fight more than three or so at once. When they're all dead, take a moment to heal up and then climb up the stairs ahead - it's time to confront Witchcraft Mary.
 |
Observing from a distance, you'll see Mary use a strange machine to extract what seems to be the life essence from a Hobbe, a Hollow Man and a Balverine, which is then deposited in liquid form into a beaker. Uh-oh. Mary takes a long swig from the beaker and transforms into... a Hobbe. Oh, how... dreadful. Well, not quite - a red Hobbe as you saw before. Break her apart into her base components and she'll soon switch to Hollow Man form. Defeat her and her summons, and you'll have to fight her final form, a White Balverine, along with some more Poison Balverines that break out of their tanks. Ultimately, she's not too tough, and the strategies for all her forms are identical to the enemies you've faced in the past.
When she's down and back in her human form, you'll once again have the option of either killing her or recapturing her in order to bring her to an institution better equipped to deal with her condition. Whichever the greater evil is is up to you (although you'll receive good or evil karma based on what you choose, so maybe not), then it's back to Ravenscar Keep. You'll receive a substantial 50 Guild Seal reward, and Milton will ask you to meet him in the records room when you're ready to proceed with
apprehending General Turner.