Did we miss anything during this quest? Is there something we didn't discover? Let us know!
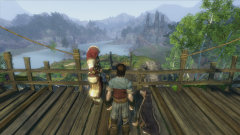
You've spent the ten years since Rose's murder at a gypsy camp outside of Bowerstone with Theresa, the kindly old woman you first met outside the merchant's caravan at the beginning of the game. The dog you saved has become your best friend, and surprisingly doesn't look like he's aged a bit.
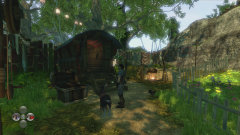
But now it's time for you to leave the safety of the camp and seek revenge against Lucien for killing your sister. Theresa has placed some helpful items in a chest by your caravan, so that should be your first destination. Proceed down the path to your right until it eventually takes you to your small but practical home. Opening the chest, you'll find a
Rusty Longsword, a
Light Splintered Crossbow, a
Placebo Health Potion, a
Dog Elixir, a
Collar of Holding, and a
Spade. Go ahead and put the collar on your dog now in order to give him a name. He's going to be with you for a very long time, so you might as well give him a personal touch. If you don't plan on spending much time in the camp, you might as well put your caravan up for rent, too. It'll earn you gold every five minutes - even when you're not playing!
Once you feel comfortable with your new equipment, make your way to the camp entrance and meet up with Theresa again. She'll bring you outside and hand you a
Bower Lake Tomb Seal, which you'll need to gain entrance to the Bower Lake tomb that lies a short distance out in the water in front of you. It'll also allow Theresa to speak with you while you're traveling.
Theresa explains that the Chamber of Fate lies within the Bower Lake tomb, and by reaching it you'll be able to tap the strength within you to truly become a Hero. Taking the path to your left will get you down to the beach (where you can swim to the tomb), but it won't be long before your dog begins barking and scratching at a spot just off the path. Pull out your spade and begin digging to reveal a
Rubber Ball, which will allow you to play fetch with your dog (thus keeping him happy) in the future.
When you reach the beach, swim across to the small island. Notice the key floating off to your right? That's one of 50
Silver Keys that are scattered around Albion. As with the first Fable, you can use the keys to open
Silver Chests for gold and other loot. Grab the key, then approach the tomb entrance and unlock it with the seal Theresa gave you.
Your purpose in here is to reach the Chamber of Fate. Your dog is scared, though, so give him a little praise before you move further into the tomb's depths. Dive into the water far below, then move to the room beyond to get your first taste of real combat. The Giant Beetles that show up are easy, so just pull out your sword or your crossbow and finish them off. When the battle's over, your dog should point you to another
Silver Key that rests behind a rock in this room.
Fight your way through some more beetles to another room with a portcullis. It isn't locked, so just prop it open and loot the chest behind it for a
Children's Health Potion. When you try to go through the other portcullis at the far end, you'll realize that you must first shoot a glowing switch that floats before you. With the portcullis now open, proceed straight ahead into the small room with a chest to grab a
Rusty Mace (with an augment slot, even!), then make your way into the water-filled room further down the main path.
In this room, you can pay a visit to the small landings to your left and right to search through some skeletal remains. The first contains
Brendan's Diary, while the other contains
Erik's Letter. Reading these gives you a better idea of what took place here. Continuing up the tunnel at the far end of the room will bring you to a third skeleton, where you'll find
Drake's Suicide Note. Notice the mention of throwing the gem into the lake? Backtrack into the water-filled room and you'll discover that there's now a "dive spot" atop the water. Dive down and you'll earn yourself a
Bewitching Augment, which will fit nicely in the mace you just looted a few minutes ago.
After battling your way farther into the tomb, you'll reach another floating switch that needs to be shot twice and melee attacked once before the door beyond will open. When you find an overturned bookshelf, take the left tunnel to reach a beetle-infested room with two chests (behind crates) and some lootable bookshelves. When you're done searching them all, you should come away with 150 gold, an
Economy Value Necklace,
The End is Almost Nigh,
The Tattered Spire, and
The Hero of Oakvale.
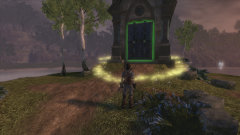
Returning to the main path, you can make the final approach into the Chamber of Fate. Theresa will give you a brief history lesson on the Heroes' Guild that once resided here, after which she'll ask you to step into the light in the center of the room. This will awaken the Hero blood within you, allowing you to channel any experience you gain into your Strength, Skill, and Will abilities from this point on. You're also given 350 Will experience, which you must spend on a spell that will be used to activate a cullis gate at the far end of the Chamber of Fate. You should only have enough experience to pick up
Inferno or
Force Push, so choose between those two and fire the incantation at the cullis gate before you.
Before returning to Bower Lake, take a moment to inspect the chest to your right. This particular chest has a special purpose in Fable II. It will contain any gold or items you earn while playing the Flash-based games on
the official Fable II website, or any items due to you for purchasing the Limited Collector's Edition. Go ahead and search it now if you think it has something for you, then proceed through the cullis gate. This will move you on to
The Bandit quest.