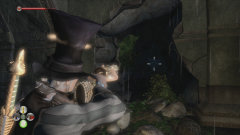
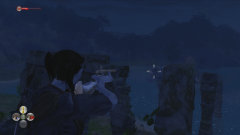
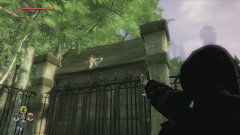
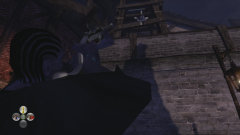
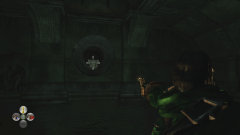
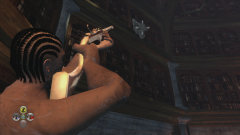
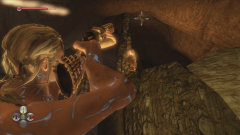
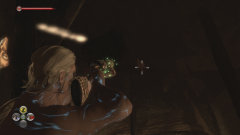
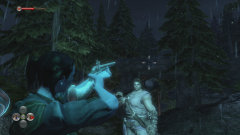
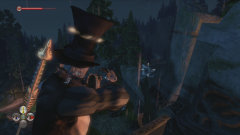
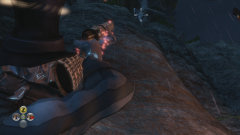
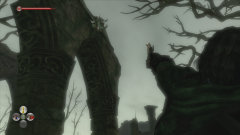
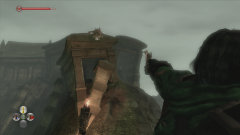
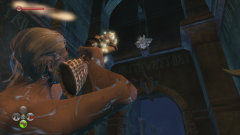
There are a total of 50 stone Gargoyles in Fable II, though they won't show up until after you've gained Aimed Ranged Attack by increasing
to level 2. Putting an arrow or bullet into their insult-spewing faces not only provides a significant amount of satisfaction, but it will also earn you several items in the Gargoyle's Trove beneath Bowerstone Market. But where are all of the stone gargoyles, you ask? Reference below:
 |
Bandit Coast Gargoyle #1
Coming from Brightwood, fight your way through a few groups of bandits and then take the left path at the fork. You'll walk along an edge on the cliff face that leads to a small cave. Once inside, scan the broken section of the left wall to find your target.
|
 |
 |
Bandit Coast Gargoyle #2
There's a ruined tower within the coast's main bandit camp. Scan its upper perimeter to find your target.
|
|
 |
Bloodstone Gargoyle #1
Proceed to the end of the dock on Bloodstone's waterfront, dive into the water, and swim over to the small landing ahead of you on the right. You can take a shot at this gargoyle from there.
|
|
 |
Bloodstone Gargoyle #2
Wedge yourself between the boathouse and the storage warehouse on Bloodstone's waterfront for a good shot at this one. Now who's the pink-bellied monkey?
|
|
 |
Bloodstone Gargoyle #3
Continue down Bloodstone's waterfront to the first crane past the boathouse. You'll find this guy hanging on the west side of it.
|
|
 |
Bloodstone Gargoyle #4
During the Treasure Island of Doom! quest, you'll wind up on Lion's Head Isle. This particular gargoyle can be found on one of the cliffs at the center of the island.
|
|
 |
Bower Lake Gargoyle #1
This one's resting on the ruins along the beach, just below the Gypsy Camp entrance.
|
|
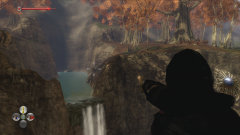 |
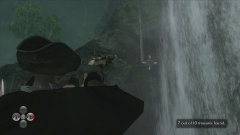
Bower Lake Gargoyle #2
You'll have to meander along the cliff to the left of the secluded waterfall in order to take a shot at this gargoyle.
|
|
 |
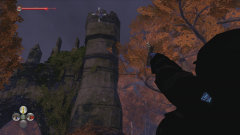
Bower Lake Gargoyle #3
Near the road leading to Brightwood, there's a ruined tower with a gargoyle mounted on its connected archway.
|
|
 |
Bower Lake Gargoyle #4
Same spot as #3... just look a little higher up on the tower itself.
|
|
 |
Bower Lake Gargoyle #5
You can snag this gargoyle inside the Tomb of Heroes during the Rescue Charlie quest bestowed by Granny Miggins.
|
|
 |
Bowerstone Cemetery Gargoyle #1
Don't forget to blast this gargoyle from the first stairway at the base of the southern hill.
|
|
 |
Bowerstone Cemetery Gargoyle #2
This bastard is perched atop the building housing the 15-key silver chest on the south side of the map.
|
|
 |
Bowerstone Cemetery Gargoyle #3
You'll find this guy hiding on the roof of a building in the southeast corner of the map.
|
|
 |
Bowerstone Cemetery Gargoyle #4
Once you've unlocked the gate leading into Shelley Crypt, turn to your left to spy this gargoyle hanging out behind the tree.
|
|
 |
Bowerstone Cemetery Gargoyle #5
This hard-to-find gargoyle can be blasted during your adventure through Shelley Crypt.
|
|
 |
Bowerstone Market Gargoyle #1
You can line up a shot at this gargoyle behind the carriage at the Bowerstone Coach House.
|
|
 |
Bowerstone Market Gargoyle #2
Take the path leading right immediately after entering Bowerstone Market. This will bring you up to the wall, where this gargoyle can be blasted.
|
|
 |
Bowerstone Market Gargoyle #3
This gargoyle thinks he's safe on the second floor of the World of Chairs.
|
|
 |
Bowerstone Market Gargoyle #4
Check the northeast wall below the main bridge and you'll no doubt spot this gargoyle.
|
|
 |
Bowerstone Old Town Gargoyle #1
While ascending the stairs in The Felling Residence, turn around and make this gargoyle eat his words.
|
|
 |
Bowerstone Old Town Gargoyle #2
You can score this gargoyle just before exiting the town toward Rookridge.
|
|
 |
Brightwood Gargoyle #1
Take aim at this gargoyle perched on the ruins in the southwest corner of the map.
|
|
 |
Brightwood Gargoyle #2
The pathway behind the Brightwood Tower will take you down to the waterfront. From there, swim over to the ruined tower on the small island for a clear shot at this gargoyle.
|
|
 |
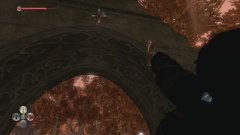
Brightwood Gargoyle #3
Once you're the proud owner of the Brightwood Tower, ascend to the top floor and blast out a window to reveal this foul-mouthed gargoyle.
|
|
 |
Brightwood Gargoyle #4
Late in the game, you can ascend to the second floor of the Brightwood Tower and vault from the ledge near the cullis gate to reach Archon's Knot. As soon as you're inside, step out of the water and destroy the gargoyle behind you.
|
|
 |
Brightwood Gargoyle #5
During The Hit quest, you'll be making a visit to Brightwood's Forsaken Fortress. When you've entered the fortress, take the eastern staircase to get a shot at this gargoyle.
|
|
 |
Fairfax Gardens Gargoyle #1
When facing Castle Fairfax, tilt your gun toward the sky and you'll get a glimpse of this gargoyle waiting to be shot.
|
|
 |
Fairfax Gardens Gargoyle #2
During the Love Hurts quest, you'll enter Lady Grey's Tomb for a chance at scoring this gargoyle.
|
|
 |
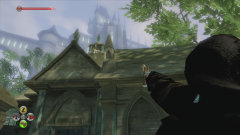
Fairfax Gardens Gargoyle #3
After defeating Lucien, you can use your hard-earned gold to buy Castle Fairfax. Proceed to the castle library to put an end to this gargoyle's trash talking.
|
|
 |
Guild Cave Gargoyle #1
Give yourself some room to aim high at this gargoyle on the ceiling of the water-filled cavern just before the Chamber of Fate.
|
|
 |
Oakfield Gargoyle #1
Everyone in Oakfield will be appreciative when you silence the gargoyle on the bridge outside of The Sandgoose.
|
|
 |
Oakfield Gargoyle #2
Apparently this gargoyle thinks he's sneaky by choosing a quiet spot on the back of the sculptor's home.
|
|
 |
Oakfield Gargoyle #3
You'll be able to add this gargoyle to your list of dead constructs near the waterfall on the way to the Temple of Light.
|
|
 |
Rookridge Gargoyle #1
Before going into the Hobbe Cave, turn to your right 90 degrees and open fire on the gargoyle sitting on this rocky wall.
|
|
 |
Rookridge Gargoyle #2
Now that you're inside the Hobbe Cave, move to the first main chamber (where you initially encounter Hobbes) and ascend the slope as far as you can. This guy is sitting on one of the wooden beams.
|
|
 |
Rookridge Gargoyle #3
Once you've gained access to the Temple of Shadows, you can score this gargoyle in the back right corner of the courtyard.
|
|
 |
Rookridge Gargoyle #4
Make your way to sacrificial room in the lower level of the Temple of Shadows, then hang a left to find this gargoyle tossing insults in the next room.
|
|
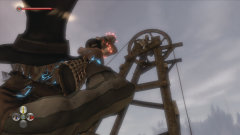 |
Rookridge Gargoyle #5
Exiting the Rookridge Inn's second floor, continue following the pathway through the mining area until you reach this large pulley system. It's not far from where you do battle with Dash.
|
|
 |
Westcliff Gargoyle #1
Not long after entering Westcliff from Brightwood, you'll spy a horseshoe-shaped column. The gargoyle is perched on the back of it.
|
|
 |
Westcliff Gargoyle #2
A little ways past the previous gargoyle is a fork in the road. Take the right path and climb the dilapitated tower there for a good shot at the gargoyle slightly below you.
|
|
 |
Westcliff Gargoyle #3
Facing the entrance to the Howling Halls, turn around and look up to your left. A grinning gargoyle awaits his demise.
|
|
 |
Westcliff Gargoyle #4
After Hammer does her little display of brute strength and knocks over the support column, cross the spikes and point your gun over at the right wall for a good shot at this gargoyle.
|
|
 |
Westcliff Gargoyle #5
While you descend to the beach from the Westcliff Camp, keep a keen eye on the cliff wall to your right. Nobody will miss his stony face.
|
|
 |
Wraithmarsh Gargoyle #1
Wraithmarsh's first gargoyle sits just inside the empty home to the west of where you first arrive in the cage.
|
|
 |
Wraithmarsh Gargoyle #2
Just before you reach the Drowned Farm, walk to the back of the wooden deck behind the sign post and turn to your right. Fire away.
|
|
 |
Wraithmarsh Gargoyle #3
You'll find this particular gargoyle perched above the spike-filled hallway in Shadow Court.
|
|
 |
Wraithmarsh Gargoyle #4
Cross the covered bridge above the Shadow Court's entrance, then continue west a little further until the remnants of a long-gone structure are on either side of the path. This gargoyle sits on the opposite side of the ruins on your right.
|
|
 |
Wraithmarsh Gargoyle #5
When you reach the southern area of the map with a ring of tombs, continue down the path a little ways to the west and blast the gargoyle mounted on the last tomb to your left.
|
|
 |
Wraithmarsh Gargoyle #6
During the Love Hurts quest, you'll be paying a visit to Twinblade's Tomb. As you approach the final room, spin around and take out the gargoyle above the archway. I can't hit a castle with a ball of dung, you say?
|


