Did we miss anything during this quest? Is there something we didn't discover? Let us know!
So you've done as the chieftain asked and activated the Sun Totem, right? Well, now it appears that the island is suffering from a major drought. The chieftain claims that it's entirely your doing and that he's the victim, but unfortunately you can't gouge his eyes out for making such a ridiculous statement. This time around, you're to activate the Storm Totem inside the Sun Shrine.
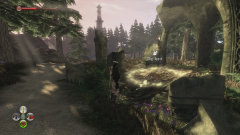
Take the same path you used to reach the Ice Shrine earlier, though this time you'll be vaulting down to the parched ground below. Follow the path to your left, killing any Hobbes that get in your way. A short jaunt later and you'll find the marked area where the
Sun Key can be dug up. Vault down the next small cliff, run through the town's lake basin, and place the key in the door of the tall Sun Shrine tower. In you go.
At the base of the spiraling staircase, you'll already be ransacking a chest for the
Knothole Blue Dye. You'll spot another chest just in the room beyond, so you might as well grab the
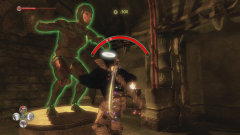
Solemn Shrinking Potion out of that, too. Next to the chest is a floating target that you'll first have to use a ranged weapon on, then a melee one to unlock the first of three doors in the room. Behind this first door is an expression statue that requires the Chicken expression to be performed in front of it. Doing so spawns another floating target that once again requires a ranged/melee combo.
This time, the door on the opposite side of the room opens revealing another expression statue. You'll need to utilize the Laugh expression to appease its requirements, after which a third floating target spawns. A magic/melee/ranged attack sequence will finally open the third door leading further into the shrine. Heading down the stairs, you'll come across a chest with a
Precious Necklace within. Pocket the loot and continue down the path into the sand-filled room, where a large group of beetles awaits you. Wipe them out however you see fit, then move through the newly opened portcullis.
Another chest rests along the waterway in the next area, so be sure to plunder it for a
Flame's Curse Augment. When you approach the floating target where the water forms a large pool, it will dart behind you and spears will thrust up from the room's floor. The target is now in a small alcove behind you, and you'll discover that you have to shoot it three times with a ranged weapon in order to get rid of the spears. Just beyond, you can ascend a wooden platform and loot yet another chest for an
Enriched XP Potion. There's a door on the opposite side of the wooden platform, but you'll need to contend with the floating target off to your left before it will open. A ranged/magic/melee attack sequence will do the trick.
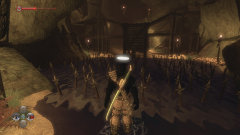
With this latest door now open, you'll be able to reach another sand-filled room inhabited by several Hobbes guardians. Wipe them out, then search their camp for a chest containing the
Knothole Knight Shirt and a lever that opens the portcullis on the far end of the chamber. More Hobbes await you in the bloody "animal carcass" room beyond the portcullis, so you'll need to deal with them before doing a thorough search of the area. To your left is a cracked wall that can be shattered, revealing
Knothole Island, Vol III. Just outside of the shattered wall is a pressure plate that, when stepped on, opens the next set of double doors. Follow the stony path past the doorway to find a chest filled with 500 gold, a fairly deep pool with a dive spot containing 250 gold, and a second chest with a bottle of
The Gangreen Fairy.
Next up is a set of fire traps that you're going to need to disable in order to continue your search for the totem. Step on the pressure plate when it isn't being belted with flames, then pull the lever and shoot the floating target behind you. With the right timing, you can now pass through the fire traps and reach another lever that will ultimately shut them all down and raise the portcullis necessary to continue on. A moss-covered chest just beyond contains the
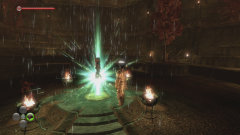
Knothole Knight Gauntlets, so you don't want to miss those. With the new gloves in your possession, move into the massive stone chamber past the next door to begin a two-wave battle with some Hollow Men. When the last Hollow Man has been sent to the void, the Storm Totem appears and you're free to activate it.
Once again, you're teleported to a stone platform elsewhere on the island. Before you start sprinting back to town, take a moment to look behind the large rock on your left a little ways up the path. Here, you'll find the
Knothole Island, Vol IX book. Upon returning to the chieftain, he'll congratulate himself on the "cunning guidance" he offered you and tell you that your new shopping opportunities around town (at Greta's Cosmetics and Knothole Stonecutter) should be considered reward enough. In any event, you'll still receive 750 renown points and the
Sun Key trophy. It's just a shame that it's now raining so much that you'll wind up having to bail the town out yet again in the
Knothole Island Drowning quest.