 Did we miss anything on this map? Is there something we didn't discover? Let us know!
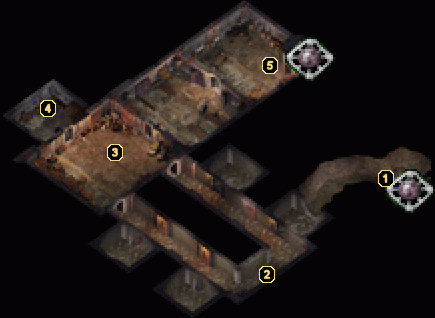
1 - Arrival
Did we miss anything on this map? Is there something we didn't discover? Let us know!
1 - Arrival
This area leads up to
the first floor of the Saradush Prison. If you came in this way, you will catch Asmay Janas, another Bhaalspawn, on her way out. She may or may not have useful information to give you.
At the end of this hallway is a door with a trap just on the other side of it. If you leave the door open and hide, guards will periodically come by and close it, and you'll be able to catch a humorous exchange of words while you wait. If you simply charge through the door, a bell will ring and you'll be attacked by several guards.
2 - Prison Cells
The actual prison cells are here - and they're guarded by a number of traps. Some of these traps are small, hard to find, nearly impossible to disarm, and are designed to go off if a character is within a certain distance. They are mainly annoyances, but they will set off an alarm and cause guards to come looking. The guards include the typical brutes you have come to associate with Gromnir, a few backstabbing, invisibility potion-drinking rogues, and one battle wizard who will, of course, cast Time Stop if given the chance.
One thing worthy of note is that each time you talk to a prisoner in this area, he will thank you for freeing him and your reputation will increase by 1. This may or may not sit well with any evil NPCs in your party, so be careful.
3 - Fflar's Scabbard
Within this room, you'll encounter a few more guards. Search the chests to reveal a
Wand of Lightning and Fflar's Scabbard, which is used to construct
Foebane +5.
4 - Exit
This exit leads to the
Saradush Sewers.
5 - Exit
These stairs lead up to
Gromnir's Stronghold.


