Did we miss anything in this section? Is there something we didn't discover? Let us know!
Background
After curing the wounded knight in the tutorial section of the game, Geralt receives an invitation to the arena tournament as a reward. It is essentially a place where you fight endless arena waves, attain high scores and prepare in between the fights.
As soon as you step into the arena, Dragan, the shopkeeper, will greet you and provide you with useful information regarding the arena system. Shortly after that dialog, you'll get to pick your difficulty level.
Points System Overview
There are four difficulty settings for the arena: Easy, Normal, Hard and Dark. The difference between the settings is that enemies in the arena deal higher damage, have more hit points and block more often on higher difficulties. Also, the difficulty affects how many points you gain per fight.
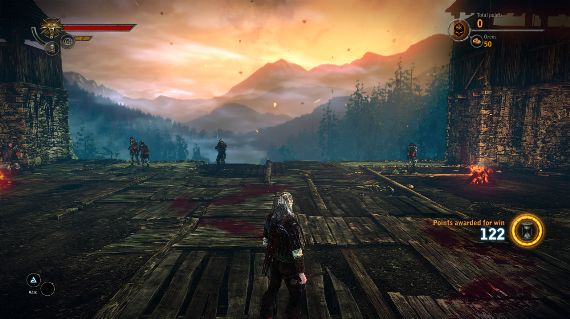
Points that you get per fight are different depending on three factors: the difficulty level, the wave number, how fast you clear the wave and how many "special" kills you've performed. Once you die in the arena, you can still continue to play, but you won't earn any points in the current and future waves.
For example, on easy difficulty setting you'd gain 25 points for the first fight and bonus 100 points for meeting the time frame of 2 minutes and 15 seconds. However, you'll almost never attain full bonus points as they count down in relation to the time left (for example, if half the time has passed for the fight that's been mentioned (first wave, easy difficulty) you'd get 50 bonus points and so on for a total of 75. If the countdown timer reaches zero, you can take your time and finish whenever you wish, earning the base 25 points.
Special kills are ones that occur once you stun and execute an opponent, or throw them into the abyss from the open end of the arena. On easy setting, they earn you 5 points each, adding another 5 for every subsequent wave (for example, in the first wave you'd get 5 points per special kill on easy, in the second wave 10 points, in the third 15 and so on).
Every new wave earns you additional 25 points (on easy setting) and an additional 100 points in the bonus pool. For example fourth wave would give you 100 (4x25) base points and 400 (4x100) possible bonus points. Fights usually have countdown timers or 2 minutes and 15 seconds or 1 minute and 30 seconds, depending on the amount of creatures faced.
Other difficulties affect points gained by adding multipliers. On normal difficulty, you'll earn double the points from easy (for example, the first wave is 50 base points, 200 bonus points, +50 base and +200 bonus for every subsequent wave and 10 points per execution kill, rising up by 10 in every new wave.
Hard difficulty adds a multiplier of 4, while dark difficulty uses multiplier of 6. Note that the dark difficulty is very very challenging, so you'll probably have a hard time clearing it without dying.
Upon dying, you can choose to upload your earned arena points to the official scoreboard, continue to play without earning points or simply leave to the main menu where you can restart the game.
Preparation for the Fights
In between the fights, you'll get a chance to get supplies from the shopkeeper. They come in form of potions and blades to enhance your combat statistics.
Items are aquired after every wave and there will be three items to pick from. The difficulty level doesn't affect the power of the items and you'll randomly get to pick from swords, armor, runes and enhancements. As the wave count increases, you'll get more powerful items. In addition to weapons and armor, you'll get orens. You'll obtain standard amount of orens, starting from 100 for the first wave and +25 for every subsequent wave (meaning that you'll get 200 (100 + 4x25) orens on your fifth wave, for example).
In addition to items and gold, you'll get a level up after every wave. Be sure to build proper character builds that will be able to deal with the later, harder waves.
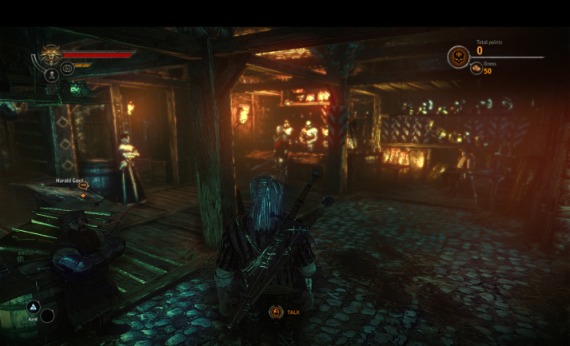
In the same preparation area, you'll find three mercenaries that you can hire. There's Harald Gord, a dwarven axeman/arbalist, whom you can hire for 250 orens, Vincent Molnar, a human shield bearer and swordfighter hired for 500 orens, and a sorceress by the name of Adrianna who'll join you for 1000 orens. The dwarf deals moderate damage, but dies relatively fast compared to others. Vincent deals about the same damage as the dwarf, but lives longer due to his shield. Sorceress is absolutely top pick, but she's definitely pricey. She deals good damage and avoids it as well, with frequent blinks and shields.
Once you hire a companion it will join every subsequent fight until he gets knocked out. There's a special UI frame which tracks ally's health. After the fight, you'll find them in the preparation area, ready to join you again for the same price.
If you explore the cellars on the left, you'll find two places of power. There's a circle of strength nearby and a circle of endurance on the lower level.
The Fight Waves
There are thirty different fights in the arena. After beating them all, the counter resets and you'll get to fight another cycle with slightly harder opponents. Even if you die, there's no end, except for the income of your points. The enemies in the waves are as follows:
- 3x La Valette Swordsman, 1x La Valette Arbalist, 1x La Valette Armored Footman
- 2x Bandit Halberdier, 2x Bandit Shield bearer, 1x Bandit Swordsman
- 5x Nekker, 2x Nekker Warrior
- 2x Scoia'tael Swordmaster, 2x Scoia'tael Archer
- 3x Endrega, 2x Endrega Warrior
- 1x Sorcerer, 2x Kingslayer
- 1x Werewolf
- 2x Guardsman Halberdier, 2x Guardsman Arbalist, 2x Armored Guardsman
- 1x Bruxa, 2x Wraith, 2x Zombie Swordsman
- 1x Elite Kingslayer, 1x Kingslayer
- 14x Nekker, 5x Nekker Warrior
- 5x Drowner, 2x Drowned Dead
- 1x Sorcerer, 2x Kaedweni Armored Footman, 1x Kaedweni Arbalist
- 6x Harpy, 4x Erynia
- 3x Armored Dwarf, 2x Dwarf Arbalist
- 5x Rotfiend, 2x Greater Rotfiend
- 2x Sorcerer, 4x Kaedweni Swordsman, 1x Kaedweni Shield Bearer
- 12x Nekker, 4x Nekker Warrior, 2x Troll
- 3x Kingslayer, 2x Sorcerer
- 4x Werewolf
- 2x Elite Kingslayer
- 2x Arachas, 5x Endrega Warrior, 2x Queen Endrega
- 3x Bullvore, 4x Rotfiend, 2x Greater Rotfiend
- 5x Golem
- 8x Wraith, 2x Zombie Arbalist, 3x Zombie Swordsman
- 7x Gargoyle
- 4x Werewolf, 8x Nekker Warrior
- 6x Draugir
- 3x Golem, 7x Gargoyle
- 1x Draug, 4x Draugir
In the end, arena provides a nice place to practice combat against certain types of enemies. Some waves might be particularly hard depending on the difficulty level, especially the wave with 5 golems, or the ones with a lot of large creatures.
Good luck and have fun while battling your way in the arena!


