Did we miss anything in this location? Is there something we didn't discover? Let us know!
The Haus De Hexe is guarded by a glyphed gate that can only be unlocked via the amulet you retrieved
in the Teutonic Base. Now that Orvus has unlocked its secrets, you can open the gate and make your way
inside. Just inside the Haus, you'll notice a triangular puzzle on the floor. The idea behind reaching
Etrius' private chambers is to find all three
pieces of the puzzle and place them in their appropriate spot on the floor. Each piece is located
behind the three doors along the far wall, guarded by Tremere
Neonates,
Apprentices,
Regents,
Lords,
Elementals,
Hoppers, and even the Tremere's accursed creations
-
Gargoyles.
I recommend obtaining the piece behind the middle or far right doors first, due to the fact that the
far left door leads to the Gargoyle lair and you should get every bit of experience and equipment you can
before dealing with them.
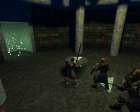
Assuming you take my advice, I will go over the middle door first. This door leads into a laboratory
of sorts, where the Tremere have been doing grotesque experiments in order to enhance their powers. It is
well guarded, with a few of the rooms containing Tremere Lords, so be careful. Lords will use
the Call Lightning discipline (among others), which can make short work of any member of your party if
used consecutively.
As you make your way through the laboratory, be sure to grab the Beserker Fang on a table in one of
the guarded rooms. It is one of the few unique artifacts in the game. Additionally, you will find Gold
Bullion, which can be sold for a nice chunk of change to any of the various shopkeepers. Once you reach
the end of the lab, destroy the Tremere guarding the triangular puzzle piece, claim it as your own, and
then step through the portal back to the beginning of the Haus De Hexe.
Insert the laboratory's puzzle piece into the triangle on the floor and head through the far right door,
into the Tremere Library. Once again, you'll face several Tremere Lords, among other enemies. Whenever
possible, destroy the Lords first to reduce the amount of damage you take going through this level. This
is pretty much a hack n' slash area, so once you've made your way through, grab the second puzzle piece
and return to the triangle on the floor to place it in its slot.
Lastly, head through the far left door. This level is different from both the laboratory and library, due
to the fact that the walls are etched out of cave and there is very little treasure to be had. Watch out
when entering some of the darker rooms, many of them contain gargoyles just around the corner. If you move slowly,
you should be able to avoid having to fight more than one or two gargoyles at a time. Continuing on, you
will eventually reach a room with a woman named
Virstania.
As with most final enemies, she is not very happy to see you and battle begins almost immediately. She isn't
very difficult, but she is flanked by a gargoyle which can make the battle go poorly if taken lightly.
You'll want to focus all of your attacks on one or the other initially to avoid having to fight both for any
serious length of time. Once you've taken them down, grab the final puzzle piece and head through the portal.
After inserting the final puzzle piece, the door at the top of the spiraling stairs opens, allowing you entrance
to Etrius' private chamber. As soon as you grab his journal on the table just inside,
Etrius will teleport
in to express his anger that you have penetrated the Tremere fortress. To emphasize his power, Etrius will
finish Erik's transformation into a gargoyle and use him against the remaining three members of your party.
Unfortunately, you have no choice but to slay your former companion and then engage in battle with Etrius himself.
The key to defeating Etrius is to keep your characters spread apart, but keep him busy. Using Celerity will
ensure that you can attack him quick enough to ruin much of his discipline use. Keep on him with a strong amount
of melee and he will eventually back down and teleport away.