Did we miss anything during this quest? Is there something we didn't discover? Let us know!
After a
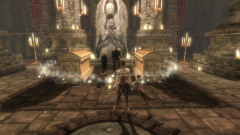
rather hectic day, you'll be inside The Catacombs, the tomb of the Hero of Bowerstone from Fable II and your late father. Head down the hall with Jasper and Walter, and you'll come to a pedestal, a large statue and two sarcophaguses. A short cutscene will play as Walter reveals the Guild Seal clasped in the hands of the statue. Pick up the Guild Seal and you will be transported to the Road to Rule, your own "path" to leading the kingdom, and where you'll do your leveling-up by spending the Guild Seals you earn throughout the game.
You'll be greeted and told of your destiny by Theresa, the so-called Blind Seeress who you may recognize from the first two Fable games. Once she's done talking, go forward and use your Guild Seal to open the single chest, which will grant you the Fireball Spell Gauntlet. Although you only have access to one new ability right now, at later points you'll be able to select from a much wider range of options to better customize your character. For now, though, Fireball it is... and you'll need it in the coming minutes. Once you're done, exit through the portal that appears.
Once back in The Catacombs, use your newly-found magical abilities to cast a surround spell on the pedestal you're standing on. This will cause the floor to open up and reveal a staircase leading into the depths. Remember that you can cast both surround spells, which injure enemies around you in a radius, as well as throw regular spells, which are faster but (at least for your Fireball spell) can only hit a single enemy at once.
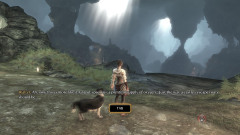
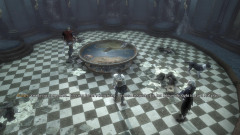
Continue down the stairs and follow the path. You'll end up in a large, open cavern with a surprisingly scenic view. There's little to do here but to turn to the left and continue along. Keep heading forward and you'll soon come across the
first Silver Key in the game in a side passage off to the left. Silver Keys are hidden collectables (though this one isn't too well hidden) you'll use to unlock
Silver Chests, which require a certain number of Silver Keys to open, and have special rewards inside, such as Guild Seals or large amounts of money.
Keep going along the path, listening to the banter between Walter and Jasper, and you'll find yourself at a crossroads. While the path continues straight forward, take a quick diversion to the left if you wish. Here you'll see the first
Gold Door in the game. Gold Doors, as you might expect, can only be opened by
Gold Keys, which are like Silver Keys but much more rare and hard to find - there are only four of them in the game, and unlike Silver Keys, they're used up when you open each of the Gold Doors, so you'll need to collect all of the Gold Keys if you want to open every Gold Door.
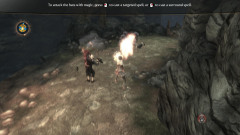
Further down the path you'll be confronted by your first enemies, though they won't do much harm to you: bats! Well, it's a cave, isn't it? Use the bats as target practice for your new Flame spell in order to get used to the controls and the capabilities of your Fireball spell. Once the bats are defeated in most Heroic fashion, continue forward once again. You'll come to a spot overlooking a shallow pool. As you start to head down the stairs, another round of bats will come at you, and like before, they won't do any damage to you. Rescue your friends from the foul beats, and head down the stairs into the water.
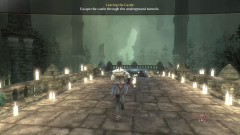 |
You'll shortly come across a sewer entrance. Walter speculates you're underneath Bowerstone Industrial, Albion's manufacturing district, and home to some nasty labour practices and living conditions, which no doubt you'll deal with in the future. Also: more bats. Well, one problem at a time, right? Deal with the bats as before and continue into the sewers. Inside, you'll come across a crack in the wall (there's nothing down the tunnel), which opens into what appears to be a dead end. Not quite: it's actually a Cullis Gate, a magical transportation system used by Heroes since the ancient times of Albion. Step onto it and activate it using your surround spell as you did earlier with the floor pedestals, and you'll be brought to the Sanctuary.
 |
The Sanctuary is a place you'll become very familiar with, as it effectively functions as both a safe haven and a menu screen. Inside, you'll find the world map (useful for fast traveling and viewing your quests), as well as organizing your inventory, performing co-op tasks, and so on. Your father, the previous King of Albion, left a book behind for Jasper instructing him on how to use the Sanctuary. Talk about convenient. Once the conversation's over, approach the map table and you'll see the map interface. Select the Dweller Camp (it's the only location you have right now) and travel there.
Congratulations! You're done with the opening tutorial of Fable III! Fortunately, things are just getting started, and the world is
about to open up quite a bit for you.