 Did we miss anything in this location? Is there something we didn't discover? Let us know!
Thieves' Guild - Level Two
1 - SAVE POINT
Did we miss anything in this location? Is there something we didn't discover? Let us know!
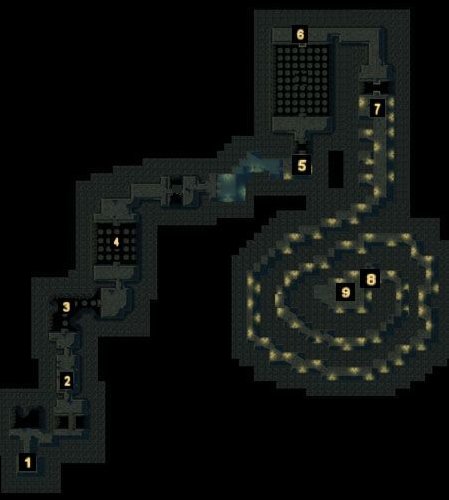
Thieves' Guild - Level Two
1 - SAVE POINT
The stairs up to level one and a save point are here.
2 - GAUNTLET
Timing is the only thing that will save you from the energy balls being blasted at you in this hall.
3 - PLATFORM
A mild jumping puzzle takes you deeper into the level. Don't stay on the floating rocks too long.
4 - PLATFORM REDUX
This jumping puzzle is a bit tougher, as several rocks will disappear when you stand on one.
5 - SAVE POINT
The next save point is here. Use it before you head to the next jumping puzzle, which is hard. Try to land in the middle of the rock because you often have to jump at an angle to reach the next stable one.
6 - SPIDERS
On the other side is a save point and some spiders, led by a giant spider.
7 - SAVE POINT
Jump across to the next save point.
8 - MONSTER MASH
A little bit of everything blocks your way to the next save point along these halls: oozes, gelatinous cubes, spore monsters, spiders, and rats. Be sure to save because coming up, you finally get to deal with Karne.
9 - KARNE
The best way I found to deal with Karne was to shoot at him until I was out of ammo, then let him bring the fight to me. You can block his throwing knives, then hit him when he comes in to go melee. When you've beaten him, loot his armor and dagger, then head down the stairs to the lower level.


